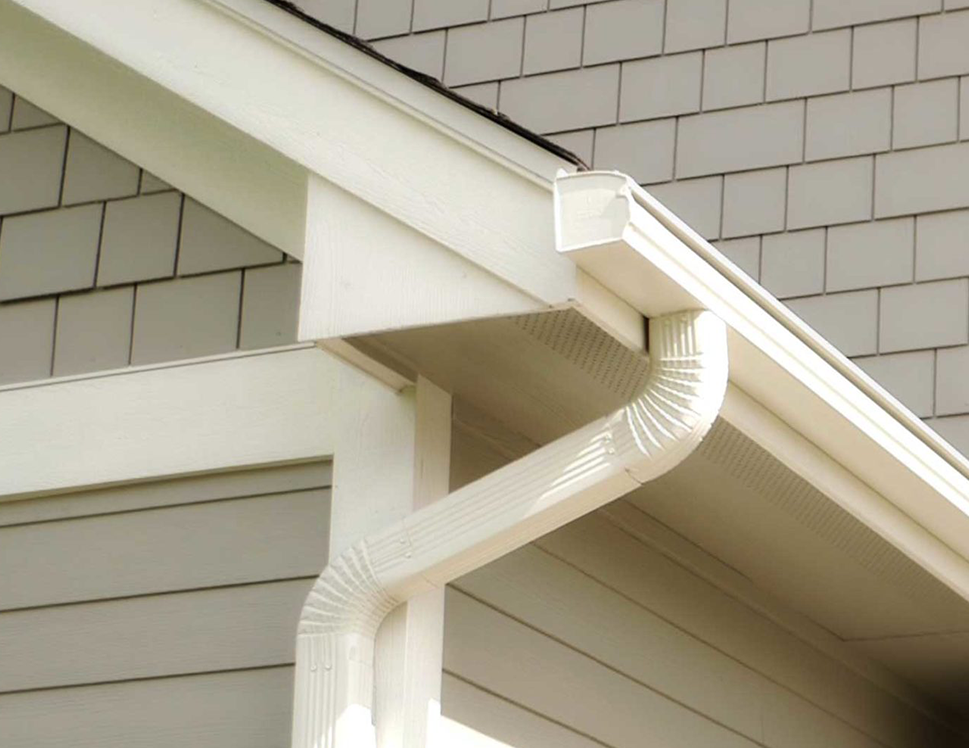
As a contractor, installing eavestrough properly with the best material available will help safely manage stormwater and preserve your client’s yard.
We’ve put together this helpful guide to ensure that you use the best materials and take the proper precautions before you install eavestrough for your clients.
Eavestrough & Downspout Parts
The Most Common Eavestroughing Materials
Aluminum
Steel
Copper
The Most Common Eavestroughing Materials
Two Types of Eavestrough:
Sectional and Seamless
DIY Eavestrough Installation
Precautions Before You Start
Tools Required For Eavestrough Installation
Order Your Products
Eavestrough & Downspout Parts
Eavestrough is composed of two main elements: the eavestrough and the downspout.
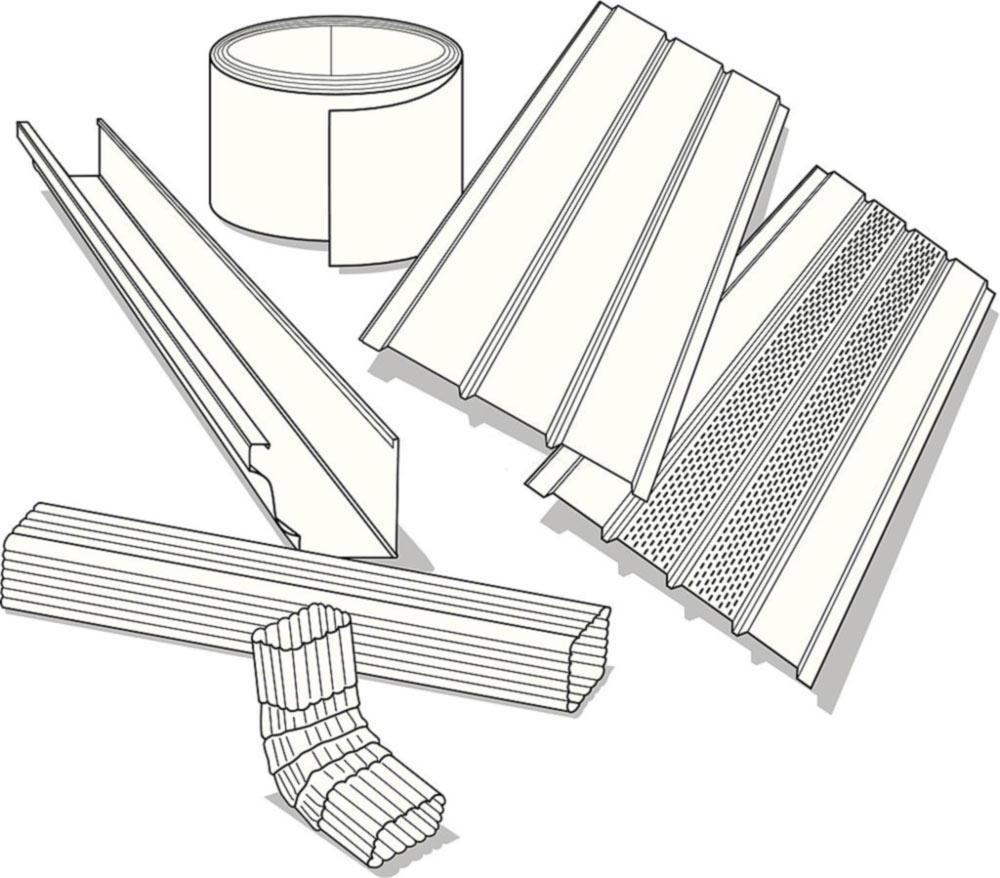
Each of these is made up of several parts:
Endcap
A piece of formed metal placed on the end of a section of the eavestrough to close off the channel.
Corner
The piece of eavestrough installed at a 90-degree angle on the edge of a roof, in the corners.
Outlet
Piece of eavestrough that provides the hole through which water travels into the downspout. Placed at the centre of the eavestrough channel.
Downspout
A vertical pipe that carries water away from the house.
Downpipe
A vertical pipe where water goes through from gutters and roof catchments to the drainage.
The Most Common Eavestroughing Materials
Eavestrough is installed to guide rainwater that rushes off the roof and towards the downspout.
Here are some of the most common eavestroughing materials and why they should be used in certain situations.
Aluminum
Aluminum is great because it doesn’t rust or crack like plastic, steel, or vinyl.
Due to the rapid hot and cold climate of Canada, aluminum is a great choice because of how it expands and contracts in the weather.
- 5” K-Style
- .025” thick aluminum
- Inside hem provides a more secure hold for eavestrough hangers
- The thickness of our paint is 8mils
- Can be ordered in custom lengths
- Available in 40 plus colours
Steel
- 5” K-Style
- 28ga pre-painted steel
- Recommended for commercial and agricultural installations, or longer length applications where expansion is a factor
- Inside hem provides a more secure hold for eavestrough hangers
- The thickness of our paint is 8mils
- Can be ordered in custom lengths
- Available in several BMI colours
Copper
Copper is used by churches and embassies that like that oxidized/classic look.
- 5” K-Style
- .021” thick copper
- Inside hem provides a more secure hold for eavestrough hangers
- Can be ordered in custom lengths
Two Types of Eavestrough:
Sectional and Seamless
Sectional eavestroughs are the more traditional option and are composed of small pieces of metal connected by seams, whereas seamless eavestroughs are composed of one continuous piece of metal custom-designed to fit the roofline.
When it comes to which is better, we tend to lean towards seamless.
This is because sectional eavestroughs are more vulnerable to leaks than seamless eavestroughs due to the fact that they have joints, which are covered with a sealant.
Long-term exposure to the elements can wear away at sealant, paving the way for leaks.
Seamless eavestroughs have much less sealant because they’re only joined when they meet at the corners. Less sealant means lower chances of leakage.
Additionally, you could use a downspout extension to help divert the water away from your client’s foundation.
DIY Eavestrough Installation
If you’re like most contractors you prefer to work alone.
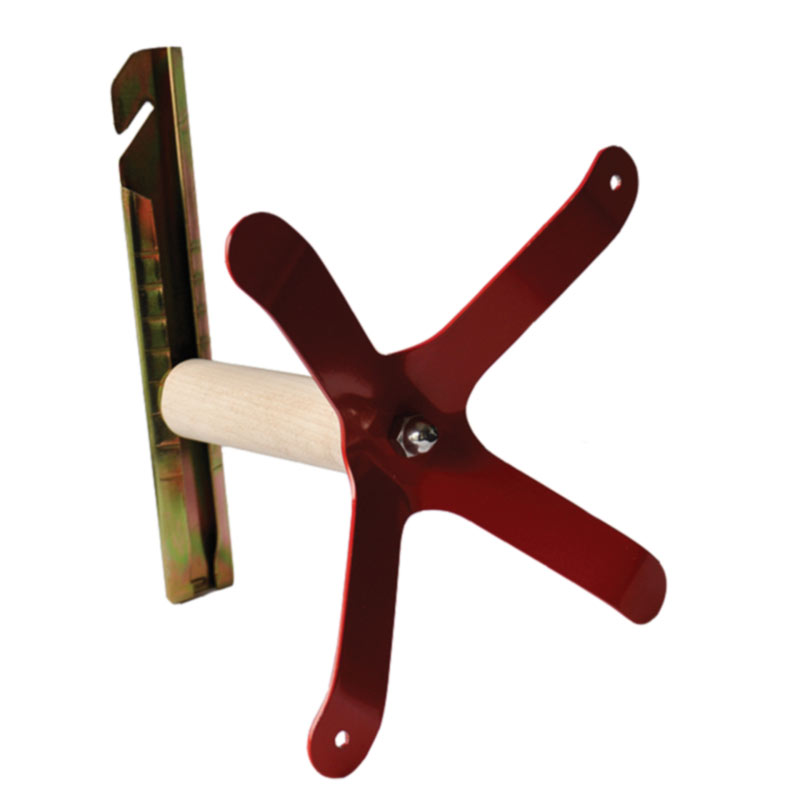
A great tool to have when it comes to installing eavestrough is a trough mate.
Trough mates temporality attach to the fascia to provide you with a rigid platform to hold the eavestrough in the proper positions.
Not only that, but it makes it possible for one person to install eavestroughs on most houses by themselves and easily adjusts for height requirements with a wooden dowel in the middle for better maneuverability.
Precautions Before You Start
Step 1
Ensure that you’ve completed your Working at Heights training and are certified to use mechanical lifts.
Step 2
If the edge of the roof is high off the ground, use scaffolding to provide better stability and safety.
Step 3
Be wary of any electrical installations or wiring when you’re moving your ladder.
Step 4
Wear work gloves and safety glasses.
Step 5
Ensure that your ladder is solid and stable before climbing up.

